
132 images of the two railway lines as they came and went from Launceston.

Halwill Junction Accident on February 1905.

Halwill Junction Accident on February 1905.

31846 at Hallwill Junction in 1964.

Halwill Junction. Photo by John White

Halwill Junction in 1963. Photo by David Mitchell

Halwill Junction.

Diesel at Hawill Junction. Photo by Peter Westall

The Last Steam Train to travel the North Cornwall Line in 1965.

Diesel at Halwill Junction in 1965. Photo by Bernard Mills

Two Deiesels at Halwill Junction in 1965

The level crossing and Junction Hotel at Halwill Junction.

Ashwater Station.

34066 'Spitfire' at Ashwater Station.

Train arriving at Ashwater from Padstow December 1964.

Ashwater Station in 1964.

Ashwater station 1975. Photo courtesy of Gary Lashbrook.

Ashwater Station in 1966

Ashwater Station in the 1960's

Tower Hill Station in 1940.

Tower Hill Station in the 1950's.

Tower Hill Station in 1956.

Tower Hill Station in the 1950's.

T9 at Tower Hill Station in 1960.

The Last Steam Train at Tower Hill Station in 1965.

Tower Hill Station. Photo courtesy of Gary Lashbrook.

Diesel at Tower Hill Station in 1966.

Tower Hill Station in 1966.

The Last day of operation at Tower Hill Station in October 1966.

The Last day of operation at Tower Hill Station in October 1966.

Egloskerry Railway Station staff in the 1900's.

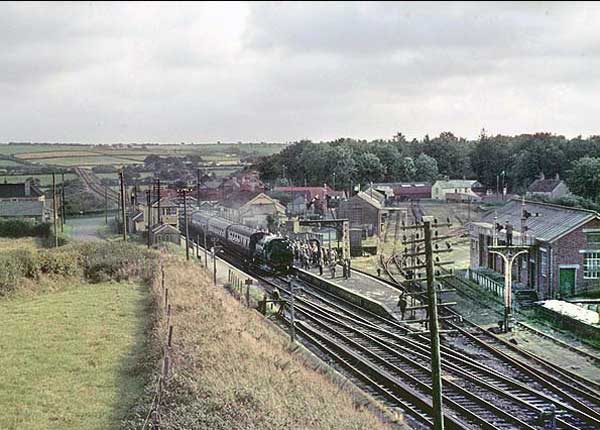
Egloskerry Railway Station in the early 1960's

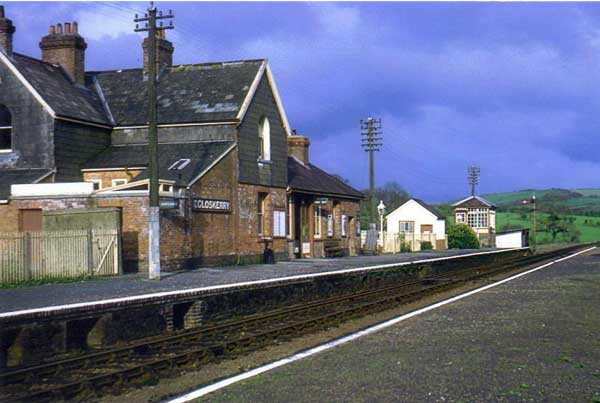
Egloskerry Station. Photo courtesy of Gary Lashbrook.

Egloskerry Station. Photo courtesy of Gary Lashbrook.

1964 N class 31842 arrives at Egloskerry from Launceston

A T9 steams through Egloskerry Station.

Egloskerry Railway Station Lamp.

Crossing Egloskerry Level Crossing.

Ace crosses the Egloskerry Level Crossing.

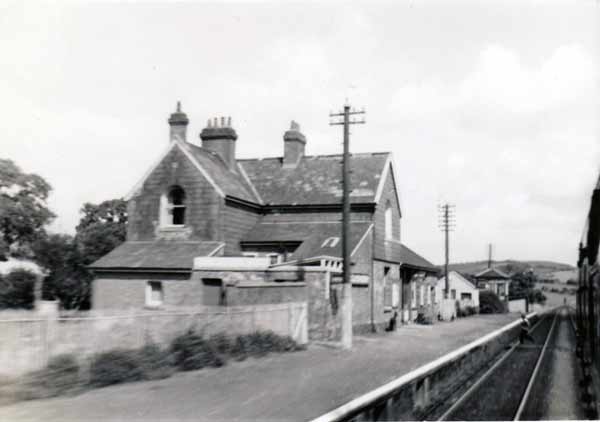
Egloskerry Railway Station.

Egloskerry Railway Station in 1964.

Trains passing at Egloskerry in the early 1960's.

Egloskerry Station Signal Box in the 1960's.

Egloskerry Railway Station Signal Box.

Railcar pauses at Egloskerry Railway Station in 1966.

Egloskerry Railway Station eagerly awaiting one of the last trains in October 1966.

The Last Train but one train at Egloskerry Railway Station October 1966.

Egloskerry Station after it had been converted by Mr. B. Smart into a private residence.

The 1892 Tresmeer Railway Station opening day.

Railway accident at Tresmeer Station in 1895.

Tresmeer Railway Station. Photo courtesy Ray Boyd.

Departing Tresmeer Station

Tresmeer Station.

Railcar at Tresmeer Station.

Tresmeer Railway Station in 1966.

O class shunter hauls a track lifting train at Tresmeer in early 1967.

Tresmeer Station after its closure.

N Class crosses Treneglos Embankment.

Treneglos Embankment.

North Cornwall Railtour on Treneglos embankment. Photo courtesy of Gary Lashbrook.

Otterham Station in 1948. Photo courtesy of Stanley Tout.

Otterham Station

Otterham Station in 1948. Photo courtesy of Stanley Tout.

Otterham Station in 1931.

Otterham Station Signal Box with Stanley Tout age15 then Dick Bolt of Otterham and Harold Knight of Exeter. Photo courtesy of Stanley Tout

Lorry driver is an ex paratrooper 'Tex delivering animal foods at Otterham Station. Photo courtesy of Stanley Tout

Otterham Station in 1948. Photo courtesy of Stanley Tout.

The Ace pulling into Otterham Station

The Ace at Otterham Station in the 1960's.

Otterham Station.

Otterham Station.

Otterham Station.

T9 at Otterham Station in 1959. Photo courtesy of Gary Lashbrook.

Otterham Station in 1960. Photo courtesy of Gary Lashbrook.

Fulford Trumps Leyland Lorry at Otterham Station.

The ACE somewhere between Otterham and Camelford.

Camelford Station.

Camelford Station

Southern Railway Coach at Camelford Station

31841 at Camelford Station in August of 1962.

Camelford Station

Railcar at Camelford Station.

Camelford Station in 1971. Photo by Roger Geach.

Delabole Station in 1964

Delabole Station

Delabole Station

Delabole Station in 1966

Port Issac Road Station.

Port Issac Road Station.

Port Issac Road Station.

Port Issac Road Station.

Trelill Tunnel entrance.

St. Kew Station.

St. Kew Station.

Wadebridge Station in 1958. Photo by John Cramp

Wadebridge Station in 1935. Photo by Roger Griffiths

Wadebridge Station.

Wadebridge Station.

Wadebridge Level Crossing at Molesworth Street.

Wadebridge Level Crossing at Molesworth Street.

Wadebridge Station in 1977.

Padstow Station on its opening day in March 1899.

Padstow Station in 1961.

Padstow Station in 1960.

Southern National Bus heading for Constantine from Padstow Station in the late 1950's.

The Ace at Padstow Station.

Padstow Station in 1963.

Little Petherick Creek viaduct.

Little Petherick Creek viaduct in 1963.

The line passes by Leat Cottage near Lifton.

The old railway line at Leat Cottage, Lifton in December 2016. Photo courtesy of David Gomm.

Lifton Railway Station in 1900.

Lifton Railway Level Crossing

Lifton Railway Station.

Lifton Railway Station.

Lifton Railway Station.

Lifton Railway Station.

Lifton Railway Station.

Lifton Railway Station. Photo courtesy Of Ray Boyd.

Lifton Railway Level Crossing in the late 1950's.

Coryton Station in 1906.

1936 Coryton Railway Accident

Coryton Station.

Coryton Station.

Coryton Station.

Lydford Station in 1962.

Lydford Station looking towards Launceston

Liddaton Halt. Photo by Mike Roach.

Liddaton Halt

Brentor

Brentor

Brentor Station.

Brentor Station.

Brentor Station.

Brentor Station.

Brentor Station in 1976. Photo by Ian Dinmore.

Mary Tavy Station signal box.

Mary Tavy Station.

Mary Tavy Station.

Tavistock Station.

Tavistock Station.

Tavistock Station.
Visits: 366